Transfer everything from old computer to new computer with Windows 11
Transfer programs and files to new computer
Transfer files from one computer to another
Transfer Microsoft Office to new computer
Restore programs and files from a broken or dead computer
Transfer directly from an old hard drive
Transfer to new computer using a USB hard drive
Corporate Windows 11 migration
User Profile Migration to new PC / new domain
How To Migrate Local Profiles to Azure AD
Migration to Server 2019 / 2016
Transfer programs and files to new computer
Transfer files from one computer to another
Transfer Microsoft Office to new computer
Restore programs and files from a broken or dead computer
Transfer directly from an old hard drive
Transfer to new computer using a USB hard drive
Move To New PC - Compare Options
Migration Kit Pro - Advanced Transfer
Transfer programs and files to new computer
Transfer files from one computer to another
Transfer Microsoft Office to new computer
Restore programs and files from a broken or dead computer
Transfer directly from an old hard drive
Transfer to new computer using a USB hard drive
In this article, we will learn how to upgrade a Windows 7 PC to Windows 10 “in-place” – while still retaining your programs, profile, settings, documents, pictures, music, movies, favorites, wallpaper and everything else.
This tutorial is for upgrading on same computer. If you are moving between two different computers, use this tutorial instead: How to Copy Programs and Files to New Computer
Upgrade from Windows 7 to Windows 10 can be a smooth, automatic process in many cases. Unfortunately, in some cases, an automatic upgrade may fail, or turn out to be unavailable in the first place (such as when upgrading from Windows 7 Home to Windows 10 Pro, or from a 32bit Windows 7 to a 64bit Windows 10).
No matter how you choose to perform the upgrade, a full backup of Windows 7 prior to starting the process is a must. You don’t want to lose all of your data if the Windows 10 installation process fails.
In this article, we will show how to perform a full backup of your Windows 7, and then – after Windows 10 is installed – how to restore your programs, settings, profiles and all files from that backup.
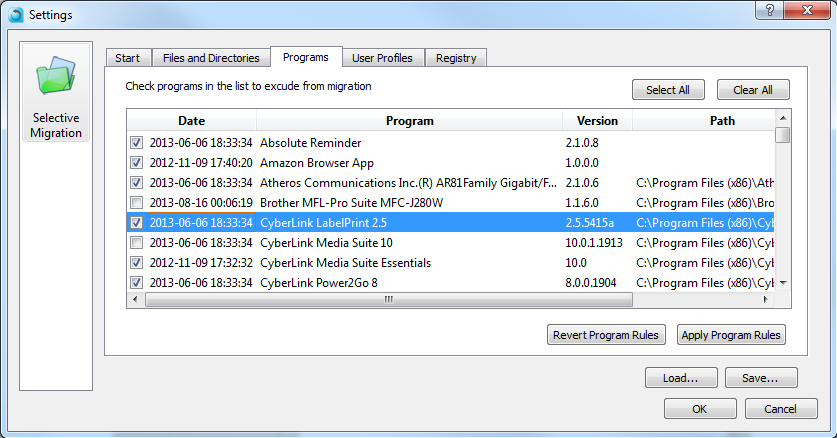
The first step in a Windows 10 upgrade is to back up everything you’ve got. There are dozens of backup applications on the market; we strongly recommend to use a “full image” backup, i.e. the kind of backup that saves everything on the computer, and not just some of your files. This way, you can restore more than just your documents; you can restore the entire computer. The product we will be using for this is Migration Kit Pro. Its unique ability is that it can restore programs and files to a completely different Windows, i.e. restore a Windows 7 backup to Windows 10. This way, if a straightforward upgrade to 10 turns out to be impossible, you can always just install a fresh Windows 10 installation, and let Migration Kit Pro restore your programs and files to it.
Before we begin, the most important part is to have a full, complete backup of your computer. This is crucial – without this step, you will lose your programs and data if you wipe the system clean.
Your stuff is now safe, and we can proceed to resetting Windows on this computer.
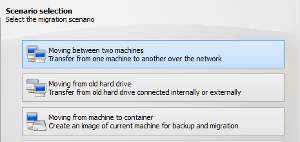
Once you have your backup, it’s time to perform the actual Windows 10 upgrade. There are several ways to do it; if you have purchased Windows 10 on a physical media such as a USB stick, you can just install from that. Another option is to download Windows 10 directly from Microsoft. Here is how to do that:
Once done, proceed to the “Restore your programs, settings and files from backup” section.
That’s it – you have a successfully installed Windows 10, without losing your programs and files!
Ready to upgrade your Windows 7 to Windows 10?
Get Zinstall Migration Kit Pro here
Any questions? Need guidance? Looking for help with your Windows 10 upgrade, backup or recovery? Our expert techs are standing by!
Contact us by email (support@zinstall.com), phone (877.444.1588), or chat (bottom-right corner of this page).
We are looking forward to assist you.